
The Ultimate 1 Week Washington State Road Trip Itinerary with Kids
Planning a family vacation to Washington? I’ve got an incredible itinerary for you!
Washington State is an outdoor lover's dream—and the perfect place for a family adventure!
STOP! Want to skip the blog post and the ads? I’ve put together a PDF with a summary o this itinerary including links to accommodations and my Google Maps with all of the activities and accommodations pinned and color coded. Grab it here!
We booked flights to Seattle for our spring break trip this year because they were the cheapest flights outside the Midwest for our dates! To be perfectly honest, I wasn’t super excited about the trip in the weeks leading up.
I had the winter dreary-wearies, and heading somewhere as gloomy as the Pacific Northwest wasn’t exactly appealing.
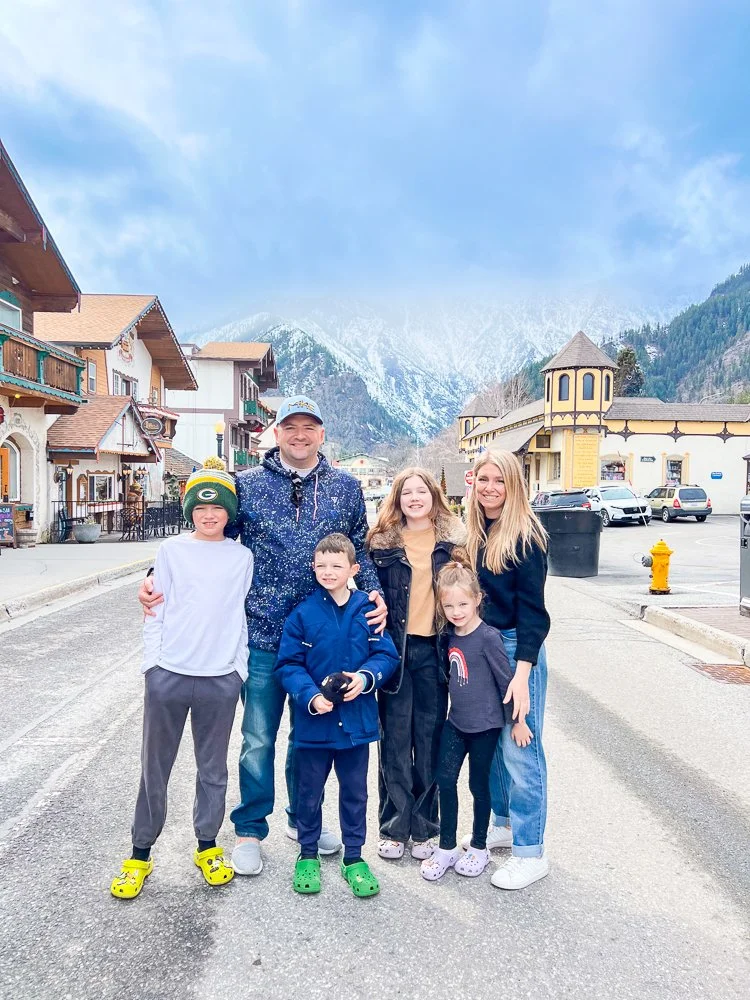
BUT, once we arrived in Washington, I couldn’t wipe the smile off my face. The scenery was breathtaking and so different from what we have in Wisconsin. I’m so glad we chose this destination, and now I’m hoping to return someday during the summer months!
On this 7-day itinerary, you'll hike through rainforests, see the Pacific Ocean, stroll through a charming Bavarian village, and explore the best of Seattle. It's a mix of nature, culture, and fun that both kids and adults will love; there’s truly something for everyone.
Whether you're road-tripping during spring break or planning a summer escape, this guide will help you make the most of your week in the Pacific Northwest.
Disclosure: This post contains affiliate links. That means if you click on a link and make a purchase I may receive a small commission at no extra cost to you.

1 Week Washington Road Trip Itinerary for Spring Break
Itinerary Overview
Day 1: Arrive, rent a car, and drive to Olympic National Park. Check into Kalaloch Lodge.
Day 2: Explore Olympic National Park (Beach #4, Tree of Life, Marymere Falls, Lake Crescent, pizza for dinner in Forks, and sunset at Ruby Beach)
Day 3: Hike in the Quinault Rainforest (Hoh Rainforest was closed during our visit), then drive to Leavenworth and check into Airbnb in the mountains
Day 4: Explore Leavenworth (Munchen House, Nutcracker Museum, shop for souvenirs)
Day 5: Stop in Leavenworth one more time, then make the drive to Seattle. Stop at Snoqualmie Falls on the way. Check into Kimpton Vintage Hotel in Seattle
Day 6: Explore Seattle (Space Needle, Chihuly, Pike Place Market, Waterfront, Gum Wall)
Day 7: Check out of hotel and fly home

Day 1: Arrive in Seattle + Drive to Olympic National Park
We flew into Seattle’s SeaTac Airport where we picked up our rental car for the week. You have to take a shuttle to the car rental garage from the airport, but it only added a few minutes to our trip.
Tip: Grab groceries or snacks before leaving Seattle since options are limited near the lodge. We stopped at a grocery store in Tacoma and purchased a cooler bag to keep our refrigerated items cold during the drive.
The drive from SeaTac to Olympic National Park Visitor Center in Port Angeles is about 2 and a half hours.
We stopped at the Visitor Center for a few reasons:
There are a lot of cool things for kids to do and look at there.
We wanted to check with the rangers about which areas of the park were open since roads can still be very snowy in March. We also got recommendations for kid-friendly hikes from them!
We needed to get our Fourth Grade America the Beautiful Pass! Every 4th Grader can get into National Parks for free with the Every Kid Outdoors program. All you need to do is have your 4th grader fill out a short quiz online, print out the PDF, and bring it with you to a National Park. We have a 4th grader this year so we wanted to take advantage of the program.
After finishing up at the Visitor Center, we had another long-ish drive ahead of us to get to our lodging. We stayed at Kalaloch Lodge, perched right on the bluff with ocean views—perfect for sunset. They have cabins that fit a family of 6, which worked out well for our family. Check rates here.
We chose Kalaloch Lodge not just for the capacity to fit our family, but for the location as well. In March, the weather can be unpredictable in the mountainous areas, so we wanted to be near the coast and the rainforest.
The cabin has a kitchen, so we made dinner using the groceries we had purchased earlier that day.
Day 2: Explore Olympic National Park
Our day started bright and early at Kalaloch Lodge. They do have a restaurant at the lodge, but we opted for groceries instead to save money.
They also have a small convenience store at Kalaloch with a coffee shop inside, so I picked up a latte and some hot chocolate for the kids to share for the first part of our day.
Tree of Life
We kicked off our day with a stop at the famous Tree of Life—a natural wonder your kids will remember! Also known as Tree Root Cave, this special tree seems to be growing out of an oceanside cliff with its roots exposed. How it remains alive and thriving is a mystery! Tree of Life is only about a 2-minute drive from Kalaloch.
Beach #4
Our second stop was Beach #4 to check out the tide pools. The park ranger had us look up when low tide was, and recommended we plan our visit to Beach #4 during that time.
From the parking lot you have to walk down a set of stairs. When you reach the beach, head right and take a short walk until you reach some rock formations.
During low tide you can see pools filled with sea life all around the rocks. First we found sea anemones, but then we spotted giant starfish! There were bright red, orange, and purple, and I think I was even more excited about them than the kids!

Marymere Falls
Our original plan was to do a hike near Lake Crescent on Day 1, but by the time we got the rental car, grocery shopped, and stopped for lunch, it ended up being much later than anticipated when we arrived at the Visitor Center.
With a long drive to Kalaloch Lodge ahead of us, we didn’t want to push it with a hike that day. We decided we would make the 1.5 hour drive from Kalaloch Lodge to the Lake Crescent area on Day 2.
The park rangers gave us 2 hike recommendations in this area: Marymere Falls, and Devil’s Punch Bowl. We ended up choosing Marymere Falls, and it was a great choice (though I think we would have had better lake views with Devil’s Punch Bowl).


Marymere Falls is a 1.7 mile out and back trail. It’s very easy for kids, with the exception of the stairs at the end to reach the waterfall viewpoint. (Although, honestly, my 5 year old ran up the stairs while I was huffing and puffing by the time I reached the top, so maybe not that difficult for kids!)
You’re mostly inside the forest during the hike, which is lush, green, and beautiful. You’re also rewarded with the waterfall views midway through the hike.
At the end of the hike right before you reach the parking lot there’s a pier that reaches out into Lake Crescent. If you want a photo with those lake and mountain views in the background, this is your stop! Just keep your kids close - there are no guardrails to keep little ones from falling in.
Lake Crescent
I think if we were visiting in the summertime we would have allocated a lot more time to have a picnic or hang out around Lake Crescent.
With the cold and rainy weather of spring, we decided to just enjoy the scenic drive along the lake on the way back to Kalaloch.
Keep an eye out for pull offs on the side of the road! We got a great photo at one of them! (It was one of the last ones before the road veers left away from the lake).
Dinner in Forks
By now you’ll be getting pretty hungry, so stop in the town of Forks (yes, the Twilight town!) which is halfway between Lake Crescent and Kalaloch.
There’s a pizzeria which made a great spot for dinner for our hungry crew.
Sunset at Ruby Beach
End the day with sunset at Ruby Beach—a true Pacific Northwest gem. This was also just a few minutes drive from Kalaloch Lodge, so we had plenty of time to get back to our cabin and recharge our phones, cameras, and our own energy.
Ruby Beach is known for its dramatic sea stacks rising out of the sea, and ubiquitous driftwood along the beach.

We had to take a short walk from the parking lot to reach the beach, and climb over some driftwood to get closer to the coastline.
I couldn’t have dreamed up a more beautiful spot for sunset. 10/10 recommend.
Tip: Bring waterproof shoes or sandals for beach exploring. We didn’t want to buy rainbows for this trip, so we just brought the kids’ winter show boots, which worked perfectly well.
Day 3: Quinault Rainforest + Drive to Leavenworth
When I was researching for this trip, I was disappointed to learn that Hoh Rainforest, one of the most popular spots in Olympic National Park, was closed. The access road to Hoh Rainforest was washed out, and they are still in the process of repairing it. (Be sure to check on the website or with the park rangers about which roads are open during your visit.
After talking to my friend Stephanie from the Backpacking Mom that knows this area very well, I learned that Quinault Rainforest is very similar to Hoh, so we decided to hike some trails there instead!
This was our last morning in Olympic National Park, and we had a 5 hour drive ahead of us and a car packed full of suitcases and backpacks, so we didn’t want to do a very long hike. Because of this we chose Maple Glade Rainforest Trail. It’s a .5 mile loop trail through the Quinault Rainforest.

It’s so easy and quick, making it the perfect taste of the rainforest for families with young children.
After completing the hike, we started our drive to Leavenworth, Washington, stopping for lunch along the way. We briefly stopped in Leavenworth for groceries. We had originally planned to do some exploring in Leavenworth that afternoon, but with a snowstorm coming in, we decided to head straight for our Airbnb in the mountains.
We checked into a cozy mountain Airbnb about 30 minutes outside of Leavenworth, and we loved having space to unwind after the drive.
Day 4: Explore Leavenworth
We woke up feeling like we were in a snowglobe!There was a snowstorm in the mountains, so we decided to have a slow morning sipping coffee and soaking in the hot tub while the fat snowflakes swirled around us. There was no wind, and it wasn’t too cold out, so the entire experience felt magical.
Once the weather cleared up and we were confident we could navigate the mountain roads, we drove the 30 minutes into downtown Leavenworth—a Bavarian-themed village that feels like a fairy tale.
We got lunch at Munchen House (outdoor seating + sausages + pretzels = kid heaven). They have a beer garden with heaters near all the seats, so it was the perfect spot to hang out with kids.
Next we strolled the streets of Leavenworth ducking into toy and souvenir shops to browse.
We also visited the quirky and fun Nutcracker Museum. They have a different scavenger hunt for each age level, so all 4 of our kids had a different scavenger hunt. We actually had a blast helping the kids complete their scavenger hunts.
Walking around worked up our appetites again, which meant it was time for a sweet treat. We stopped at the Gingerbread Factory and sampled gingerbread cookies, frosted cookies, and a gingerbread cupcake.
If you’re visiting on a clear day, there are pedestrian-only areas where kids can stand in the middle of the road and you can get some great photos with the mountains in the backdrop!
Our last stop in Leavenworth was Leavenworth Adventure Park. The kids wanted to try the mountain coaster - and so did the grownups! Our youngest rode with my husband, and I rode with our 7-year-old. You can ride 2 people to a toboggan, but your combined weight cannot exceed 375 lbs. in dry weather and 330lbs. in wet weather.
You have the option to pay for a 1-ride ticket or a 2-ride ticket right away. The 2-ride ticket gets you a slight discount on the second ride. We weren’t sure if the kids would like the alpine coaster, so we just paid for 1 ride right away. We regretted that afterward because the kids had SO much fun and they all wanted to go again, but we would have to pay the full price 1-ride ticket again if we did.
I would highly recommend this activity if you’re visiting with kids, but if you’re going during summer or on the weekend, you should purchase your tickets in advance.
Also, if you want to take video during the ride, you have to have your camera strapped to your body with a harness. You can’t hold anything in your hand since you’re using both hands for the breaks.
Finally, you can visit the Leavenworth Raindeer Farm year-round - unless you visit during the month of March like us. The reindeer farm is closed in March, but would be a magical place to visit in winter OR summer!
Tip: If you're visiting in spring, the surrounding mountains may still have snow—bring layers!
Day 5: Leavenworth → Seattle (via Snoqualmie Falls)
On Day 5 we were sad to say goodbye to Leavenworth and our cozy Airbnb, but we were also excited to see Seattle!
We made one last stop in Leavenworth for coffee or pastries. My husband and I got lattes from Little Red Espresso & Bakery. It’s a cute little coffee shop with a view of the mountains.
My kids, meanwhile, tested out the ice cream at Whistlepunk Ice Cream, and only had good things to say about it.


We drove just over 2 hours toward Seattle with a detour to see Snoqualmie Falls—an easy stop with big views! You can just park in the parking lot and walk out to the viewing platform, OR you can take a short hike to get to the lower viewing platform.
We were eager to get to Seattle so we only did the upper viewing platform by the parking lot. There is a free parking lot across the street, too.
Finally we checked into Kimpton Vintage Hotel, a family-friendly spot with a central location.
It started pouring that night, so we nixed our plan to head to Pike Place Market, and decided to save all sightseeing for our last full day in Washington.
Where we stayed: Kimpton Vintage Hotel
Tip: Valet parking is available but comes at a cost—plan accordingly.
Day 6: Explore Seattle
There is no free breakfast at the Kimpton Vintage Hotel in Seattle, so we walked over to Olympia Coffee which is just a few blocks away from the Kimpton. We got coffee and pastries there to fuel our morning.
Space Needle
Next we walked the mile to the Space Needle! Going to the top of the Space Needle was on a few of my kids’ bucket lists, so I knew we had to prioritize it in our itinerary.
(Thanks to the PR Team at the Space Needle for providing complimentary tickets for our visit to the Space Needle!)

There’s always a line to get to the top of the Space Needle, so try to prioritize getting there early in the day. Check the Space Needle website for opening times here, as they vary by day. Tips for visiting the Space Needle:
Consider a combined ticket with Chihuly Garden and Glass! You can save up to 20% on your tickets if you book these 2 attractions together.
If you don’t want to walk all the way to the Space Needle from your hotel, consider taking the Seattle Monorail!
Hang onto your tickets! You get a free photo with your tickets, and you need the information on your ticket to acess the photo online.
Your visit starts by taking the elevator to the top. It moves pretty quickly and there are full length windows so you get a great view on the way up.
You’ll start at the observation deck level where you can step “outside” to see the Seattle skyline through floor-to-ceiling windows. You an also stand on the glass benches, and since the glass windows are angled down you feel like you’re leaning over the city.
When you’re done with the observation deck you can take the stairs one floor down to the Loupe, which is a rotating glass floor. It’s so fun to grab a photo of the world beneath your feet!
If you’re hungry stop at the TipTop Cafe for either sweet or savory personal hand pies or ice cream.
Chihuly Garden and Glass
Right after the Space Needle, visit the Chihuly Garden and Glass exhibit right next door (even kids will be mesmerized).
Chihuly Garden and Glass is a museum full of blown glass sculptures by Dale Chihuly. I wasn’t sure my kids would be interested, but the sculptures are so colorful and details my kids were absolutely mesmerized!


You’ll finish the indoor portion of your visit in the Glasshouse, a glass and steel conservatory to display a 100-foot long sculpture of red, orange, and yellow flowers framing the Space Needle above. It’s breathtaking!
Step outside in the garden to see glass blowing demonstrations and more incredible sculptures.
Olympic Sculpture Park
We had a picnic lunch on the lawn outside of the Space Needle - peanut butter and jelly, apples, and crackers we had left from our previous grocery shopping trips.
I saw on my map app that the Olympic Sculpture Park was nearby, so I thought it would be fun to walk down by the waterfront to see that.
This is something I would skip. There were not many sculptures, and they were pretty boring.
However, the bright spot was that since we were already by the waterfront, our walk back toward our hotel took us past the many piers and the Seattle Aquarium.
Pike Place Market
Your next stop is Pike Place Market—don't miss the flying fish and the original Starbucks! We skipped going inside Starbucks because the line was so long.
Then walk down to the Seattle Waterfront and find the Gum Wall for a weird but fun photo op. They even have a gumboil machine that takes credit cards so you can add your mark to the wall if you’re not too grossed out.

Grab a photo at Pier 62 with the Seattle Great Wheel and the skyline in the background.
End the day with a relaxing stroll along the piers or a visit to the Seattle Aquarium if time allows.
Day 7: Head Home
On Day 7 we were up early to check out of our hotel and say godbye to the PNW.
Visiting for spring break was amazing, but we’re definitely dreaming about returning during the summer months sometime for another family adventure!
Packing Tips for Washington with Kids:
Waterproof layers (jackets, shoes, and bags!) We brought an entire carry-on suitcase with everyone’s winter boots, hats, and gloves. We wore our winter jackets on the airplane.
Layers for changing temps (especially in the mountains)
Snacks, reusable water bottles, and travel games for long drives
National Park Pass (America the Beautiful)
Camera or phone with extra storage—trust me, you'll take a lot of pictures!
Remember, you can grab my downloadable PDF here!
DON’T FORGET IT! PIN IT!


Emily Krause is a Wisconsin-based travel content creator who writes about exploring the world with kids.
On A Mom Explores you’ll find the best family travel destinations, Disney World tips, and how to make travel with babies and toddlers a little easier.
Emily believes that exploring starts in our own backyards, and adventure can happen anywhere with the right mindset.


